Thursday, 11 February 2016

Screenshots of Editing

The Editing Process
I used the edit suit Premiere Pro CC 2015 and during the editing of my music video I found lots of video effects and video transitions. The following images all show some of these effects which have either worked or haven't. I think this is an important part to editing as it shows myself learning along the way.

Auto Color

I changed the colour tones in this clip which worked really well. I selected 'Snap Neutral Midtones', here are the before and after images.
Before
 
After

I also blended two clips together and added film dissolves to this part of the music video. 


I tried to merge two images together however I found this very hard to achieve. This is shown in the final result I produced. I have now worked on this and have found a better transition which will help me achieve the split.
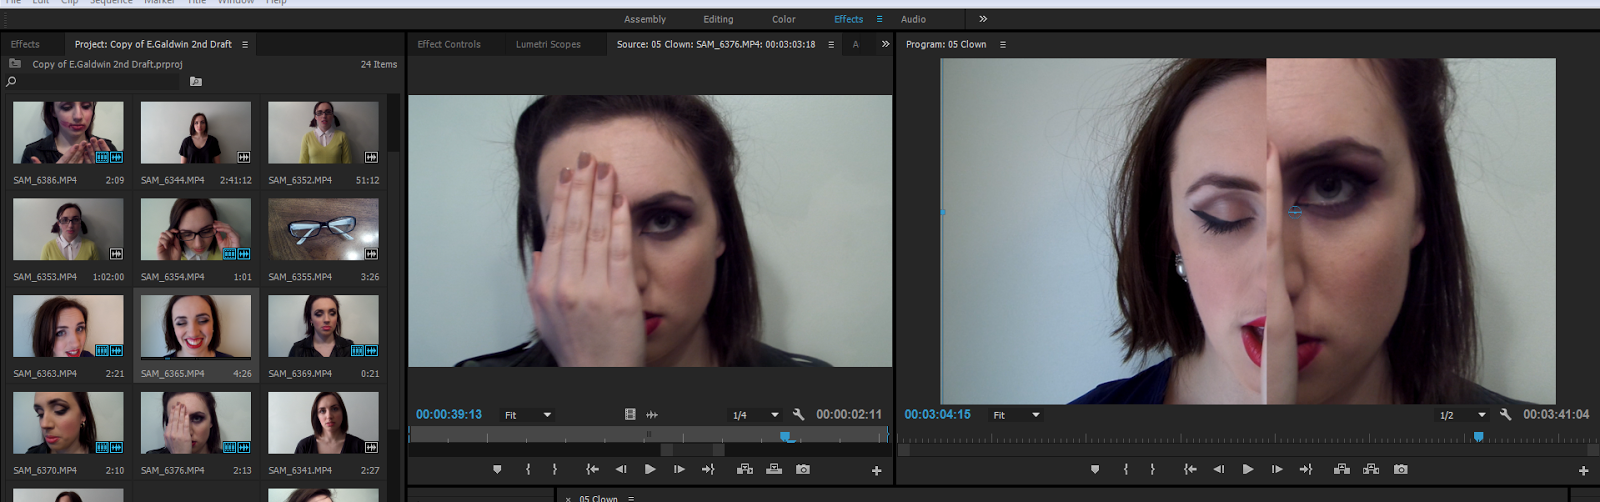

I also tried the video effect - Linear Wipe. This didn't work because the faces were not taken in the same camera frame/position. This meant that when the video wiped across the faces didn't match up.


Color Correction

I added the video effect of a color balance because I felt the image appeared to bland. This made a significant affect and I am really happy with this.


Brightness and Contrast

When the young girl is singing with no make-up on I have decided to decrease the brightness to create a ghost like appearance. This looks really effective as it is against a white background and the model is wearing black clothes.

Before

After


Reserved Clip

I have decided to reverse and slow down this clip. This is simple to do but very effective and works well with the lyrics.


Film Dissolves

I have chosen to add in a video transition of a film dissolve. This means the two clips blend in with each other and makes them look effective. As the lips move down a new face appears underneath.


Echoes

Echoes have been used a number of times throughout my video. This has been my favorite edit to use but has been the most the effective. I wanted to show the model changing her appearance and fading into new characters.


Wednesday, 10 February 2016

Changes in Make Up Designs

Idea 1
Skull Candy
-not many people dress like this
-not as relatable
-needs to be more realistic

Idea 2
Emo
- not as common
- harder to achieve the hair style

..... changed to ......

Rock Chick
- more relatable
- easier look to achieve

Monday, 8 February 2016

Setting Up Filming

The Room
I filmed in my kitchen in which I had to create space against the a white wall. I set the tripod up in front of my model and asked my other friend to help film whilst I documented what we was doing.


Lighting
At first I didn't put the main light on in the kitchen which made it very dark. Once I realised that the model needed lights around her in order to make her stand out I moved near the windows and turned the lights on.


Sitting and Standing
When I started filming I asked my model to kneel , however this is because I forgot to set up the tripod and used the table instead. I then realised that this was not an effective way to film as it meant my model would have to sit on her knees throughout the filming. Also I wouldn't be able to add camera movement or angles to my music video.


Technology Used

Tripod
Originally I placed the tripod in the middle of the floor the I moved it near the window in order to gain more light. I raised the tripod, so the camera would be in line with the models face.

Camera
I have a Samsung camera and a Samsung smartphone phone. I didn't use the camera on my phone because the camera of my phone is a  CMOS, 5.0MP (megapixels) where as my camera is a CMOS 14MP. This meant I received a better quality of image from my camera as it has higher megapixels. Also my camera has an 18x zoom which meant I could focus on certain aspects of  my model more clearly with a sharper focus.
I  hen changed the setting so I had a 3x3 grid so I could line the models face up with the boxes.


Memory Stick & SD Card
I used a 16GB SD Card which I could insert into my camera. This allowed all my videos and images to be saved onto a transportable device.
Also I saved all my work to a 16GB memory stick so it could hold all my files such as images and videos which have a large memory capacity. I felt safer carrying my memory stick around with me rather than my SD card because it is smaller and I am more likely to lose my SD card. These images show the exact memory stick and SD card I used:


Filming The Make Up Scene

Make Up
Setting Up
When setting up what make-up I will be using,  I selected a wide range of various brushes to help in choosing to correct style of make up.
I also used different palettes, lip-sticks, creams and foundations.


Geek
-Glasses
-Hair in bunches
-Minimal Make-Up
-Plain white shirt
-Yellow jumper
-Black trousers


Posh Totty
-Winged Eyeliner
-Red lipstick
-Silver diamond ear rings
-Blue crop top
-Collar bone showing
-Plain black trousers
-Slight blusher
-Dark eyeshadow


Chav
-Pink Lipstick
-Hair in a high ponytail
-Darker make-up (orange foundation)
-Leather jacket
-Gold hooped ear rings
-Dark eye shadow


Gothic/Emo
-Purple Lipstick
-Swept fringe
-Full liner around eye (top and bottom)
-Back combed hair
-Dark eye shadow


Half Face Split
Gothic/Emo
  -No ear rings
  -Dark purple lip stick
  -Hair back combed
  -Swept fringe
  -Full liner around eye (top and bottom)
  -Dark (Black/Purple) eye shadow
Chav
  -Pink Lipstick
  -Hair in a high ponytail
  -Darker make-up (orange foundation)
  -Leather jacket
  -Gold hooped ear rings
  -Dark eye shadow